
How We Gave an IDX Broker Listings Page a Fully Custom Look – Part 1
By Sarah Lennon – 7 minute read
We recently completed a custom IDX Broker integration for REV Real Estate in Cody, Wyoming. IDX Broker already provides robust MLS integration, property search, mapping, saved searches and the core functionality a real estate website needs. Our objective wasn’t to change any of that. It was to make the listings experience feel like a natural extension of the REV website while preserving everything IDX Broker already did well.
REV’s website had already established a distinctive visual identity built around deep green, gold accents, square geometry and clean typography. The standard IDX Broker listings pages worked perfectly, but visually they felt disconnected from the rest of the website. That consistency matters. When we approach a custom web design project, third-party platforms don’t get a free pass simply because they sit outside WordPress. If visitors move from the main website into property search, the experience should still feel like the same website. It’s part of the same broader thinking we discussed in What Should Every Small Business Website Include?: design, usability and functionality need to work together rather than as separate pieces. Achieving that meant understanding exactly where WordPress ended and IDX Broker began, identifying which system controlled each part of the interface, and adapting the presentation without interfering with the underlying functionality. This article explains how we did it. It isn’t a guide to configuring IDX Broker. It’s a case study in custom front-end integration.
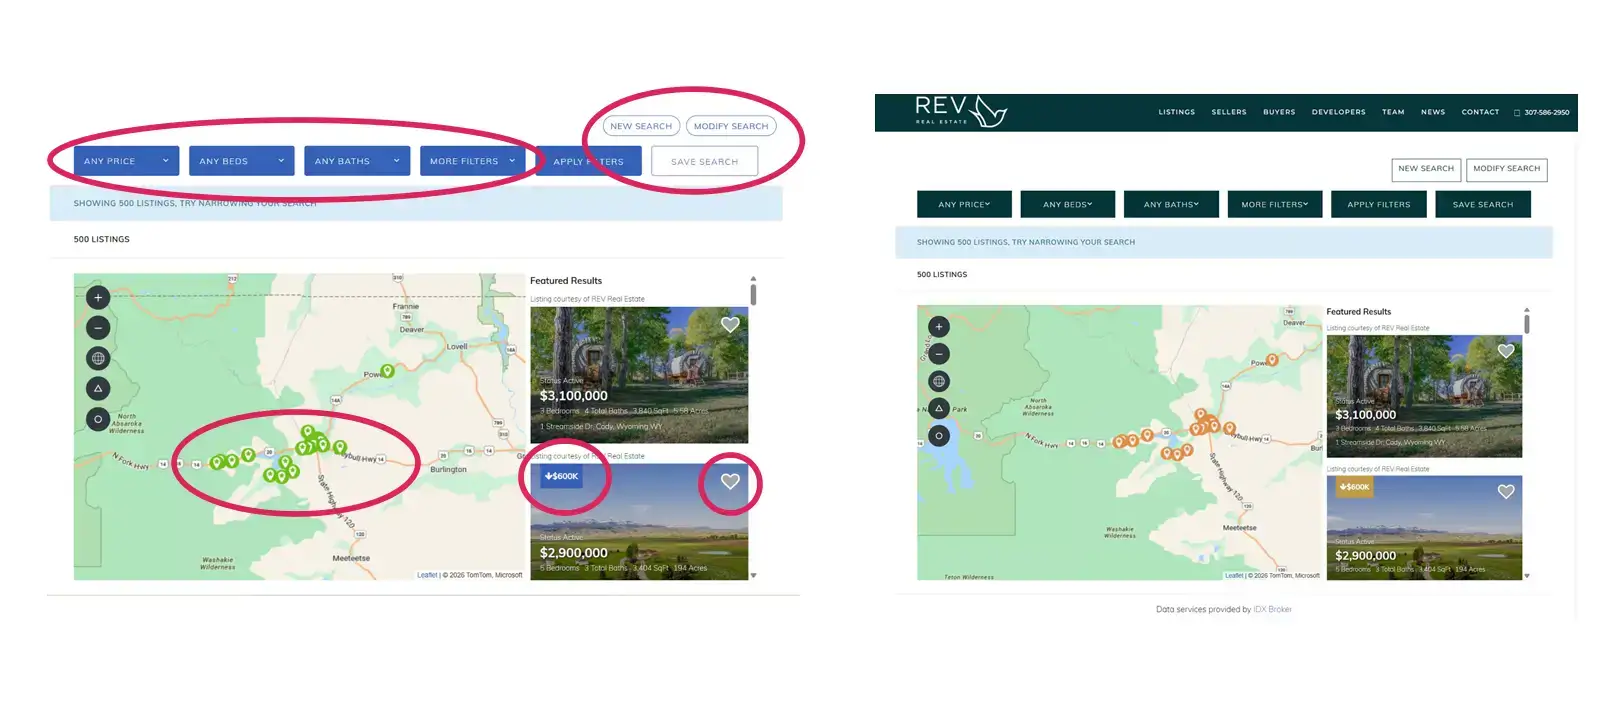
The Starting Point: A Generic IDX Broker Listings Page
The original listings page did exactly what it was designed to do. Visitors could search properties, explore the map, save searches and open individual listings without issue. Visually, however, it followed IDX Broker’s default design. Blue buttons, rounded corners, standard map pins, registration elements and the default property popup all contrasted with the rest of the REV website. Our first job was therefore not to rebuild the property search, but to understand what we could safely change around it.
Step One: Understanding What WordPress Controlled
Before writing a single line of CSS, we needed to understand where every part of the listings experience was actually being generated. IDX Broker supplied the property data, search tools and listing interface. WordPress controlled the surrounding website and parts of the page presentation. Knowing where one system ended and the other began determined how we approached every change.
Using Chrome Developer Tools, we inspected the HTML generated by IDX Broker and identified the classes and IDs responsible for individual visual elements. Rather than applying broad CSS rules that risked affecting unrelated parts of the page, we targeted specific components: search controls, action buttons, notification bars, map markers, price-reduction badges, favourite icons, registration elements and homepage listing widgets. The functionality remained untouched. We were changing how IDX Broker looked, not how it worked.
That distinction is important. Custom website development doesn’t always mean replacing existing technology. Quite often the better solution is to preserve functionality that already works and concentrate the custom development where it actually improves the experience. Visitors care far more about whether a website is intuitive and easy to use than how much of its technology was built from scratch, which is also why first impressions matter so much when someone lands on a website.
Restyling the Listings Page Through WordPress CSS
The first phase focused on the main listings interface. Using WordPress’s Additional CSS, we created a tightly scoped stylesheet targeting only the IDX elements we wanted to change. That precision mattered. Early in the project, one layout experiment altered the relationship between the map and listing results. Rather than forcing a new page structure simply because we could, we stepped back. The existing IDX layout worked well. So we kept it.
Over approximately 200 lines of CSS, we instead applied REV’s existing design system to it. Buttons adopted REV’s green and gold colour palette, rounded corners became square, map pins and price-reduction badges were restyled, registration elements were updated, and homepage listing widgets were brought into the same visual language. Property cards received improved spacing, shadows and calls to action. Nothing fundamental about IDX Broker changed. Search tools, live listings and map behaviour continued to operate as before. But visually, the listings interface no longer looked like a separate application dropped into the website. It looked like REV.
Finding the Right CSS Targets
Writing the CSS was only part of the work. Finding the correct elements to target took just as much care. Rather than guessing class names, we inspected the HTML generated by IDX Broker directly in Chrome Developer Tools. A single button can be controlled by several selectors. Elements such as map pins, badges and favourite icons can also change classes depending on whether they are active, selected or being hovered over. Documenting those variations first allowed us to write precise selectors that affected only the intended elements.
The result was a stylesheet built specifically around IDX Broker’s generated markup rather than a collection of broad overrides that might cause problems elsewhere. This is one of those parts of web development visitors will never see, but it makes the difference between a customization that merely looks right today and one that remains manageable later.
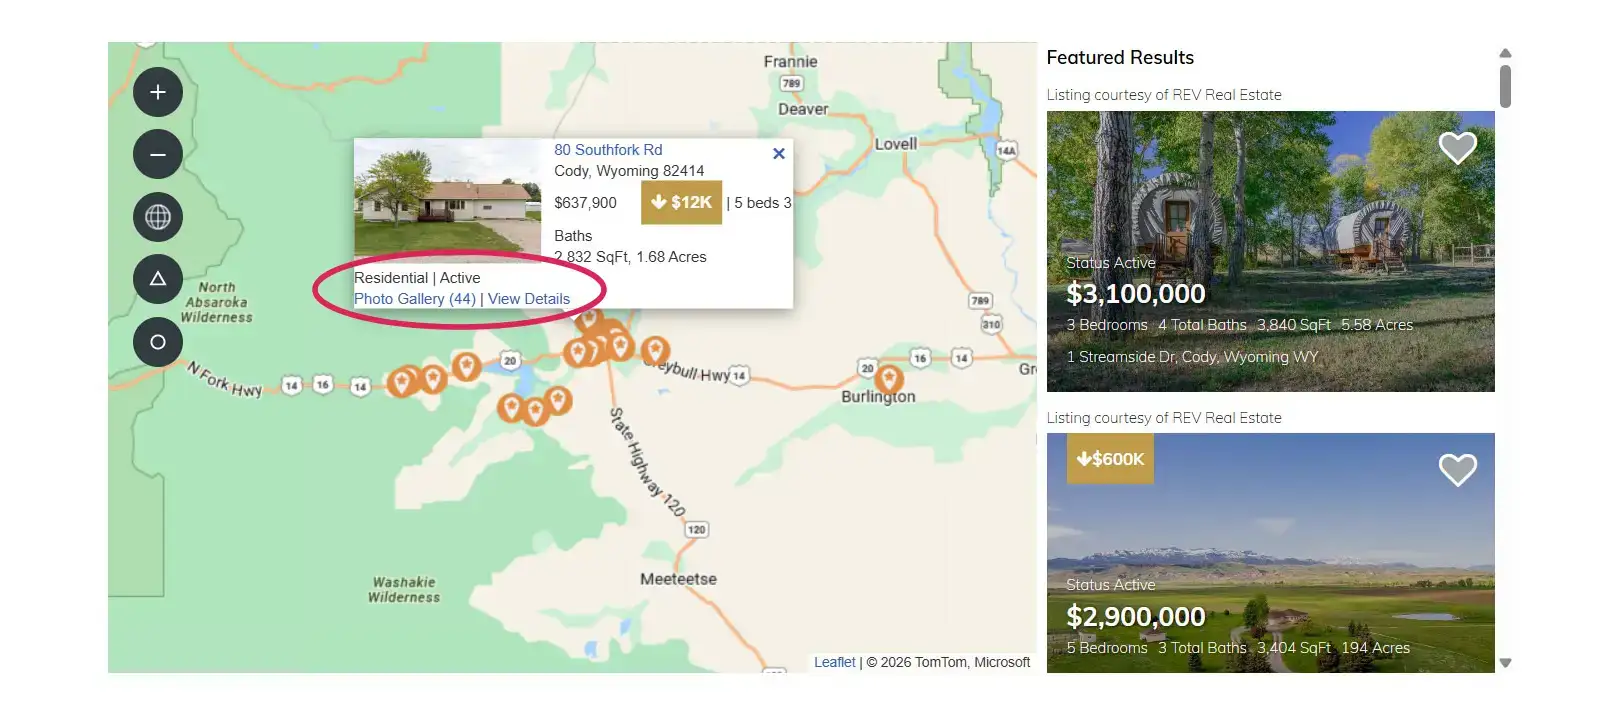
Then We Reached the Property Popup
One element behaved differently from everything else. When a visitor clicked a map pin, the property information popup appeared visually within the listings page, but it wasn’t actually being controlled by WordPress. Our WordPress CSS had no effect on it. Using Developer Tools, we traced the popup back to the hosted IDX Broker page and confirmed that its styling needed to be handled separately through IDX Broker itself.
A simple background-colour test in IDX Broker’s Custom CSS area proved we had found the right place. That allowed us to bring the popup’s basic styling into line with REV—green links, gold accents and the same overall branding and visual identity used elsewhere. But it also exposed a more interesting problem.
The default IDX popup leaves plenty of room for improvement. Listings containing more information can become cramped, badges can alter the balance of the layout, and changing the dimensions of the popup introduces complications because its position is calculated dynamically by the mapping software. We experimented with a more substantial redesign, but quickly reached the point where changing one aspect of the popup affected its behaviour at another screen size.
At this point, we suspect the answer lies in restricting some of that styling to specific screen widths using CSS media queries, rather than trying to force one layout to work everywhere. That will need a little more detective work and proper testing across desktop, tablet and mobile, so rather than rush it, we stopped. The existing popup works. It now fits the REV branding more closely, and we’ll return to the larger question of completely redesigning it in Part 3 of this series. Because before we did that, something more important needed our attention.
A Good Property Search Still Has to Produce Leads
Once the listings experience looked right, the next question was much more practical: What happens when somebody actually finds a property they’re interested in? A beautifully integrated property search isn’t doing much for a real estate business if potential buyers browse listings and disappear without making contact. IDX Broker already contained the tools we needed: visitor registration, saved properties and searches, automated emails, lead routing and notifications. But, just as with the visual side of IDX, having those features available and having them configured around the way REV actually works are two different things.
That became the next phase of the project. In Part 2, we’ll look at how we turned the customized IDX search into a lead-generation system: when visitors are asked to register, what they see, what happens after they register, how leads are routed internally, and how REV is notified when a new prospect arrives.
The Finished Result
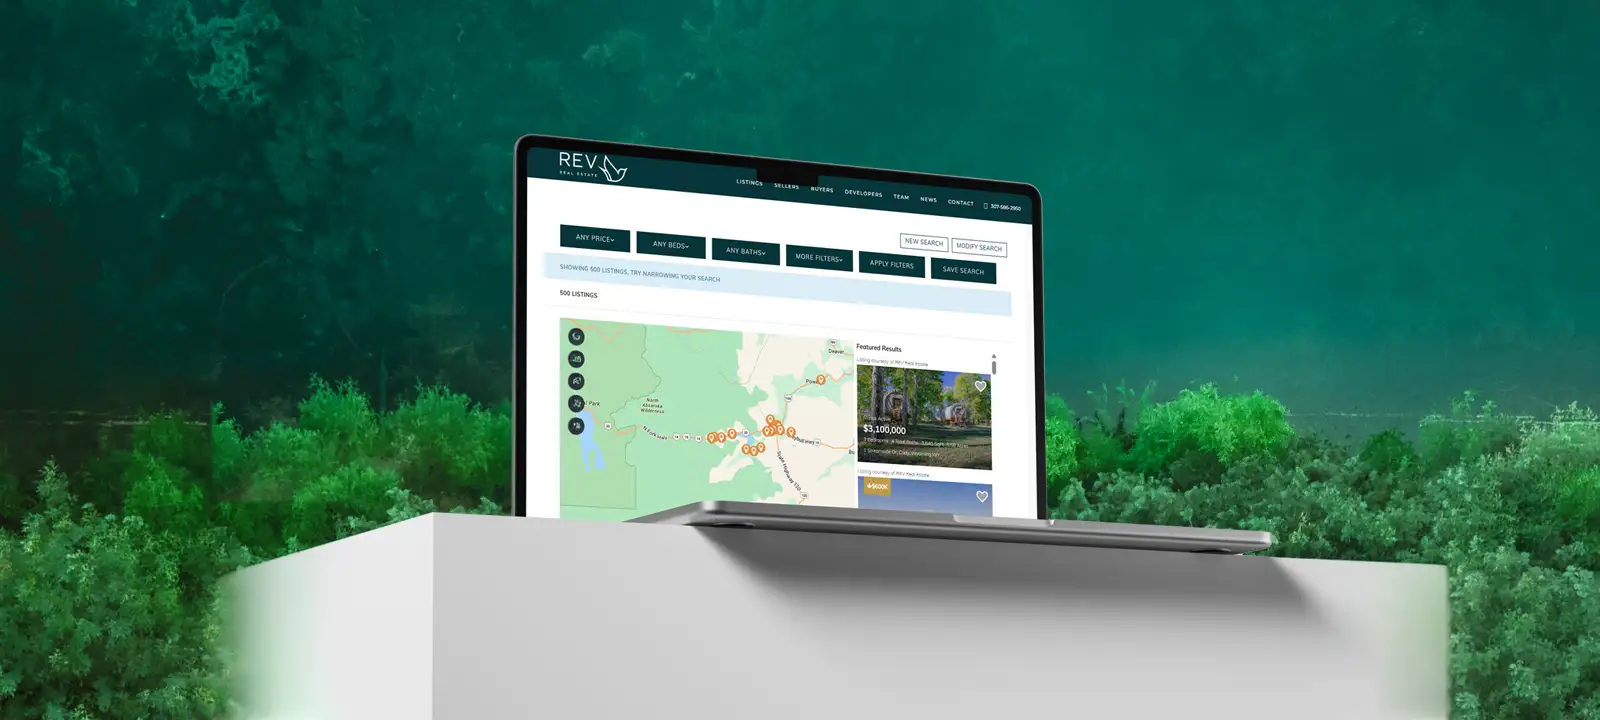
The listings experience remains powered by IDX Broker. Live MLS data, property searches, saved searches, favourites and map functionality continue to work exactly as before. What changed is what visitors experience. The listings pages now reflect REV’s branding, typography, colour palette and spacing. Instead of reaching the property search and feeling as though they have entered a separate application, visitors remain within the same visual experience established throughout the website. That was the objective from the beginning.
Custom Integration Goes Beyond Installation
Installing IDX Broker is the easy part. Creating a seamless integration requires understanding which elements are controlled by WordPress, which are generated by IDX Broker and where it is safe to customize the presentation without interfering with the MLS functionality underneath. There isn’t a button marked match the rest of my website.
This project involved approximately 10–15 hours of development, testing and refinement across desktop, tablet and mobile. Much of that time was spent analysing generated markup, tracing where individual components originated and testing changes against live listing data. It is detailed work, but it is also what makes the finished integration feel simple. The visitor shouldn’t need to know where WordPress ends and IDX Broker begins. Ideally, they shouldn’t notice at all.
Does Your IDX Search Feel Like Part of Your Website?
For many real estate websites, property search is one of the most important parts of the entire site. Yet it is frequently the point where the design changes and the experience starts to feel disconnected. It doesn’t have to. IDX Broker can provide the MLS infrastructure while the surrounding website provides the design, branding and user experience.
At Big Orange Planet, we build custom real estate websites that combine third-party platforms with custom design and front-end development. You can see more examples in our portfolio, learn more about our web design services and SEO services, or contact us to discuss a project.
- Turning IDX Broker Property Searches Into Leads — Part 2: connecting the IDX Broker property search to REV’s lead-generation process.
- Finishing Our IDX Broker Customization: Solving the Property Popup — Part 3: rebuilding the IDX Broker property popup for desktop while preserving its native responsive behavior on smaller screens.
Get the Good Stuff
No fluff. Just practical web design ideas, SEO insight, behind-the-scenes projects, & solutions we've tested in the real world.
Never Miss a Good Idea
More Big Orange Knowledge
How Much Does a Professional Website Actually Cost?
How much should you actually spend on a professional website? The answer…

Does ChatGPT Content Rank in Google
Discover how AI is revolutionizing web design — from smart automation and…

Printing on Merchandise
There are excellent, easy to use web sites that enable you to print all manner…

What Business Owners Think SEO Is vs What SEO Actually Is
Many business owners know they need SEO but have a very different idea of what…

Web Design Trends: What’s Actually Changing — and What Still Matters
Web design changes constantly, but not every trend matters. Here's what is…

What Makes A Website Feel Expensive?
Some websites instantly feel polished, credible and expensive while others…