Any visual web content has weight. And the larger a file’s size, the slower it loads. Even a couple of second delay can turn users off your web site. Slowness on the web makes you appear outdated.
Web site sluggishness is also a huge red flag to google. Your slow site will be rejected by google and you will get bad SEO. In other words you won’t appear in any google searches.
Say for example you are a n online gift box creation company. As there are not many people in this specific niche you would expect to pop up instantly on page 1 of a google search if someone typed in “specialized gift boxes”.
And if people went to your site they would immediately hire you! As your homepage has rave customer reviews and endless photos of your beautiful work. However some fool built your web site and all the images are enormous. So your site loads clunkily.
Which makes it look badly built to google. For Google is the self imposed standard police of the web and seeks excellence from the web sites it patrols.
Everything needs to be instant for google to approve. Google is unimpressed with your huge images and so sends you to the wasteland beyond page 3 of a google search… ever looked that far? No, no one has.
Happily though it’s easy to sort this out with your photos. You can scale down the physical dimension and the picture’s pixel quality quickly in photoshop.
To explain what this means let’s imagine you got a professional photographer to take a photo of your best gift boxs The image would be 300 dpi – which means “dots per inch”. The more dots in an inch the richer the image. If you want to physically print a photograph of your boxs to blow up and hang on the wall of your workshop, you want this print quality at 300 dpi.
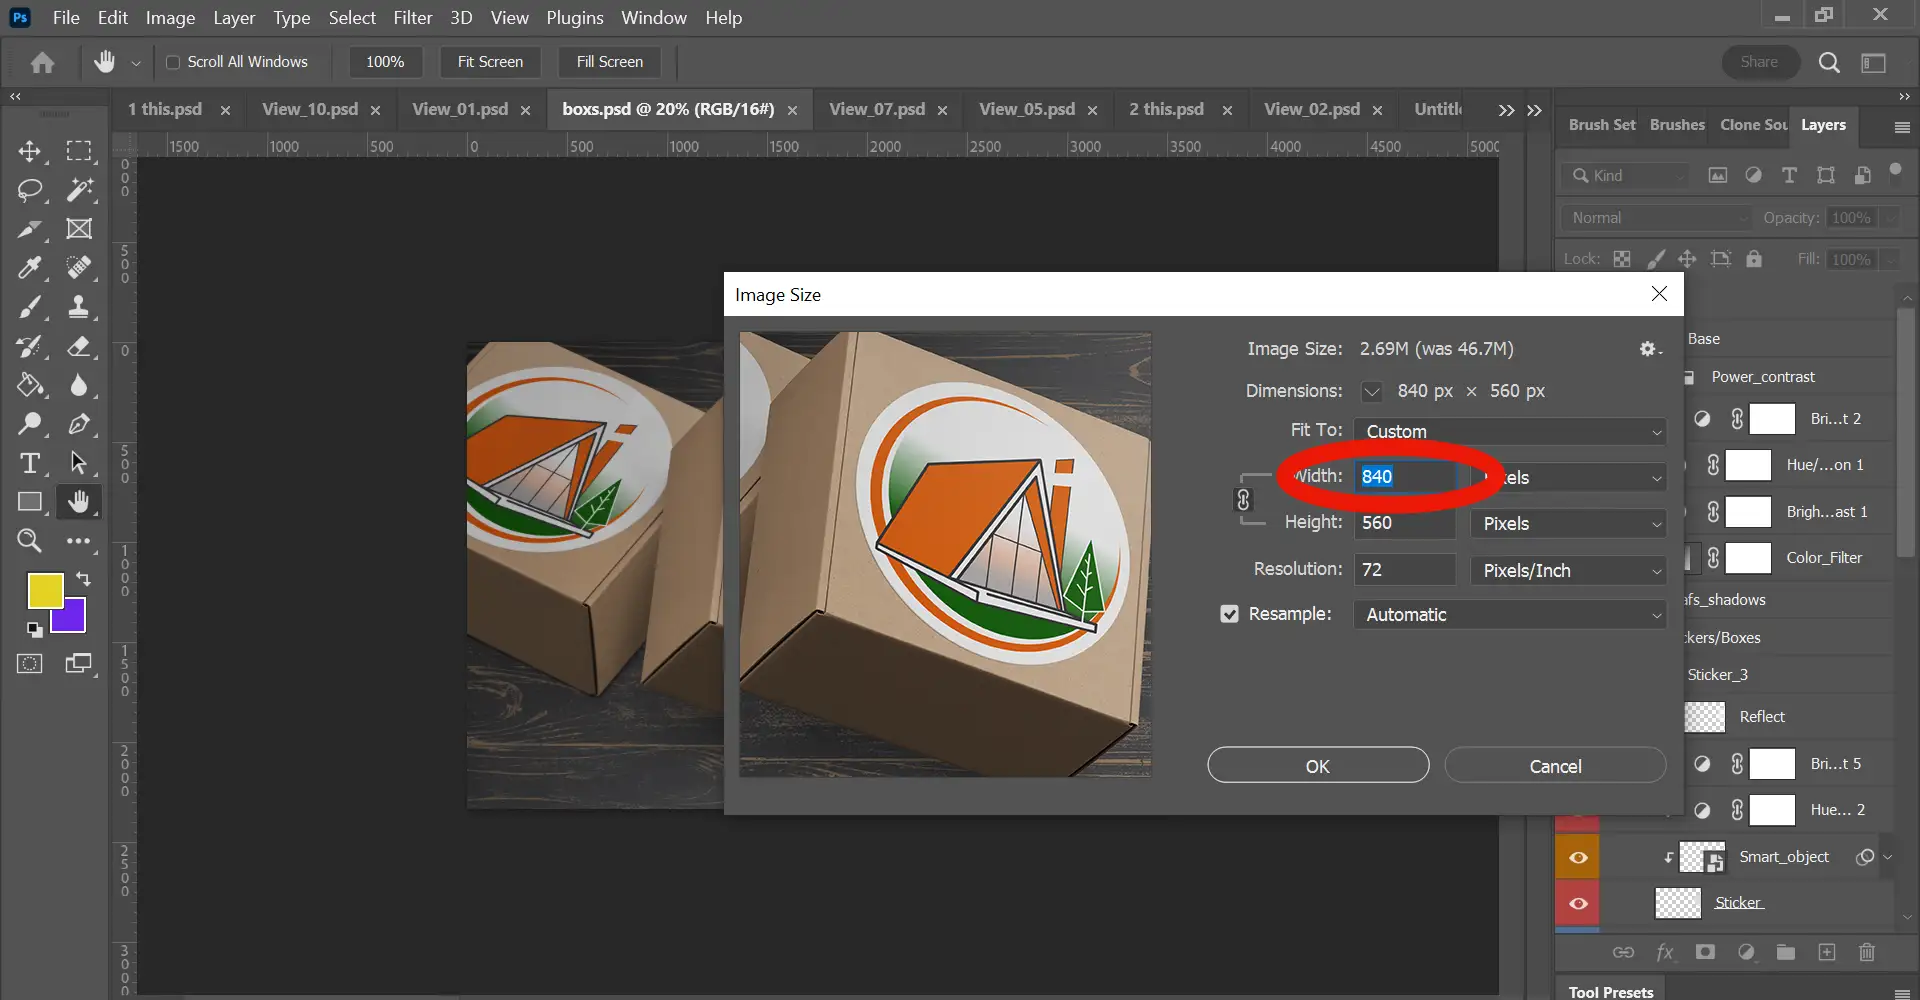
However for images for the web you need a far lower quality 72 dpi. Just this first step of changing the dpi will dramatically reduce your file size.
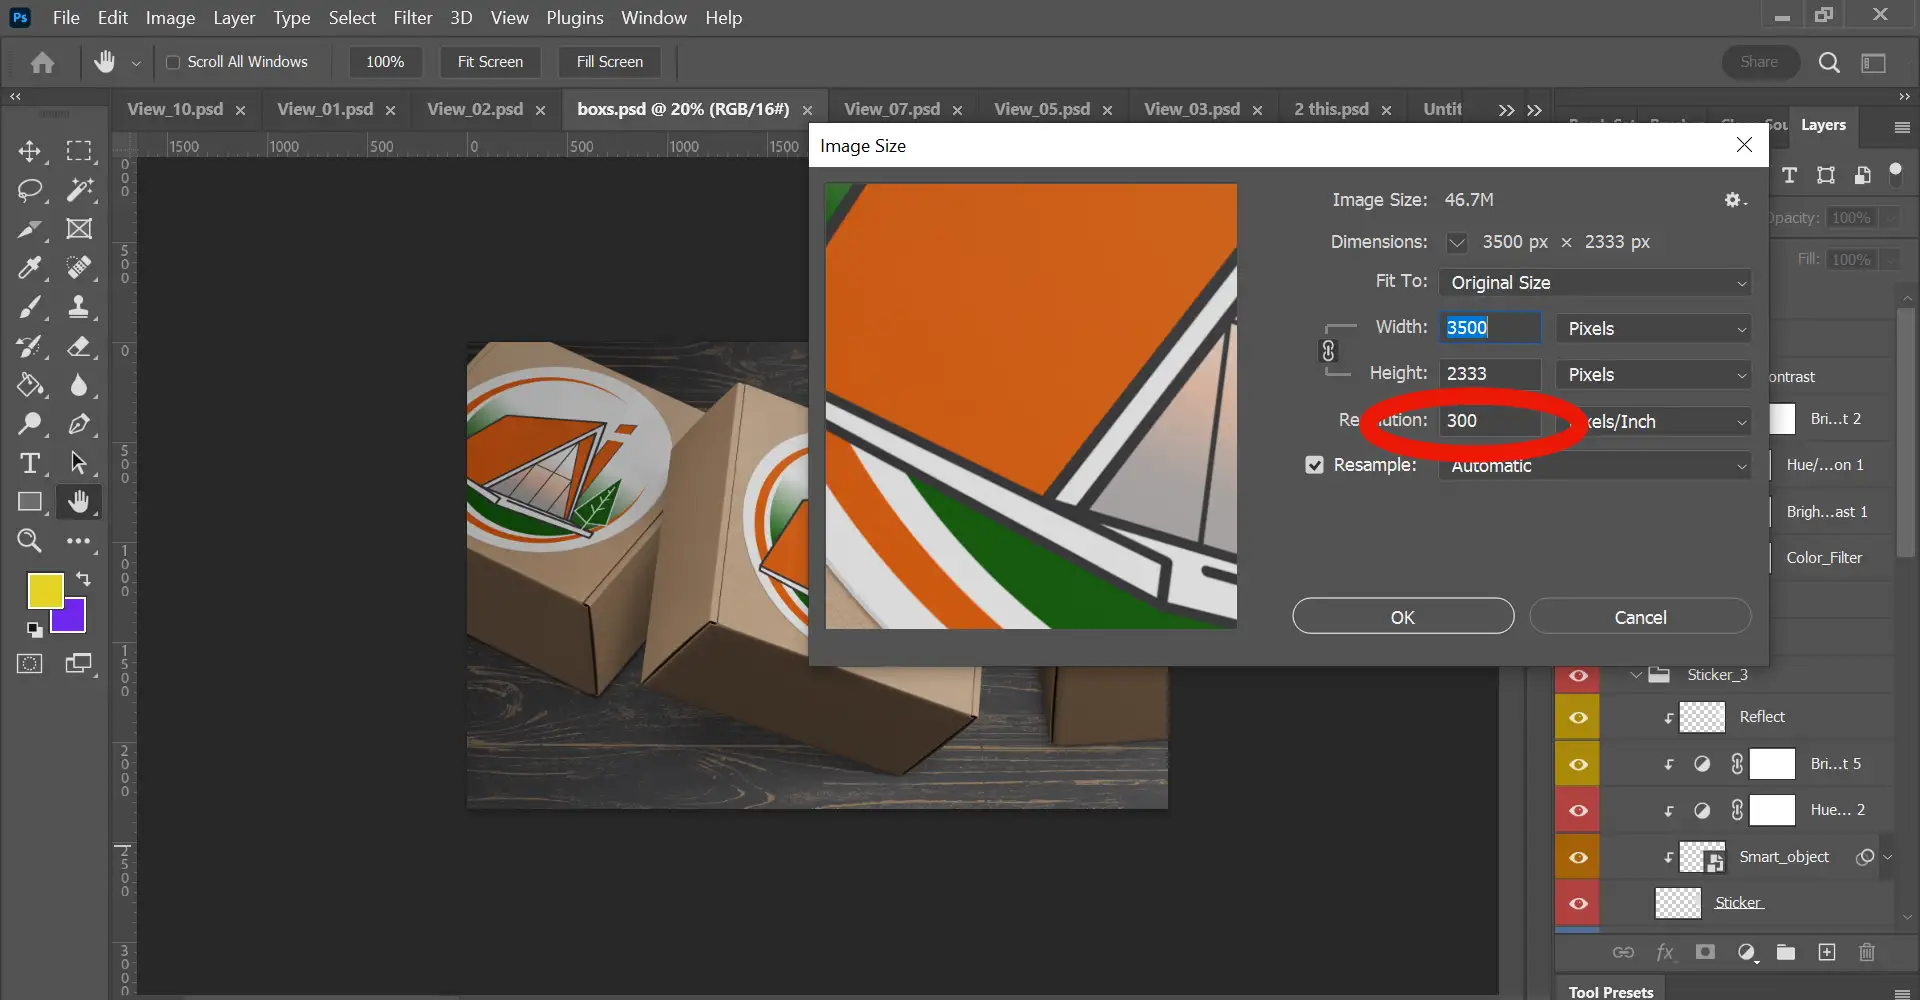
While still in the Image Size option also change the width and height dimensions of your image.
An image for the web doesn’t need to be more than 2000 pixels wide for full screen width. By cutting your image size down you are carving off unnecessary extra weight.
If your image is not going to be full screen go smaller still.
Next lets export your image in the best format for web, a WEBP file (not a jpg!).
WEBP files preserve the highest quality of your image at the lowest format. A jpg image that would have been 200kb is only 98kb in WEBP format, but still looks fabulously crisp. Every image of this site is a WEBP file.
WEBP is a file format built specifically for web use, unlike jpgs.
Another benefit of WEBP files is that Google approves of them and is looking for them. If your site uses WEBP files rather than jpgs you will rank higher with Google.
So file size, site page load speed and SEO benefits all included in WEBP files, win win!
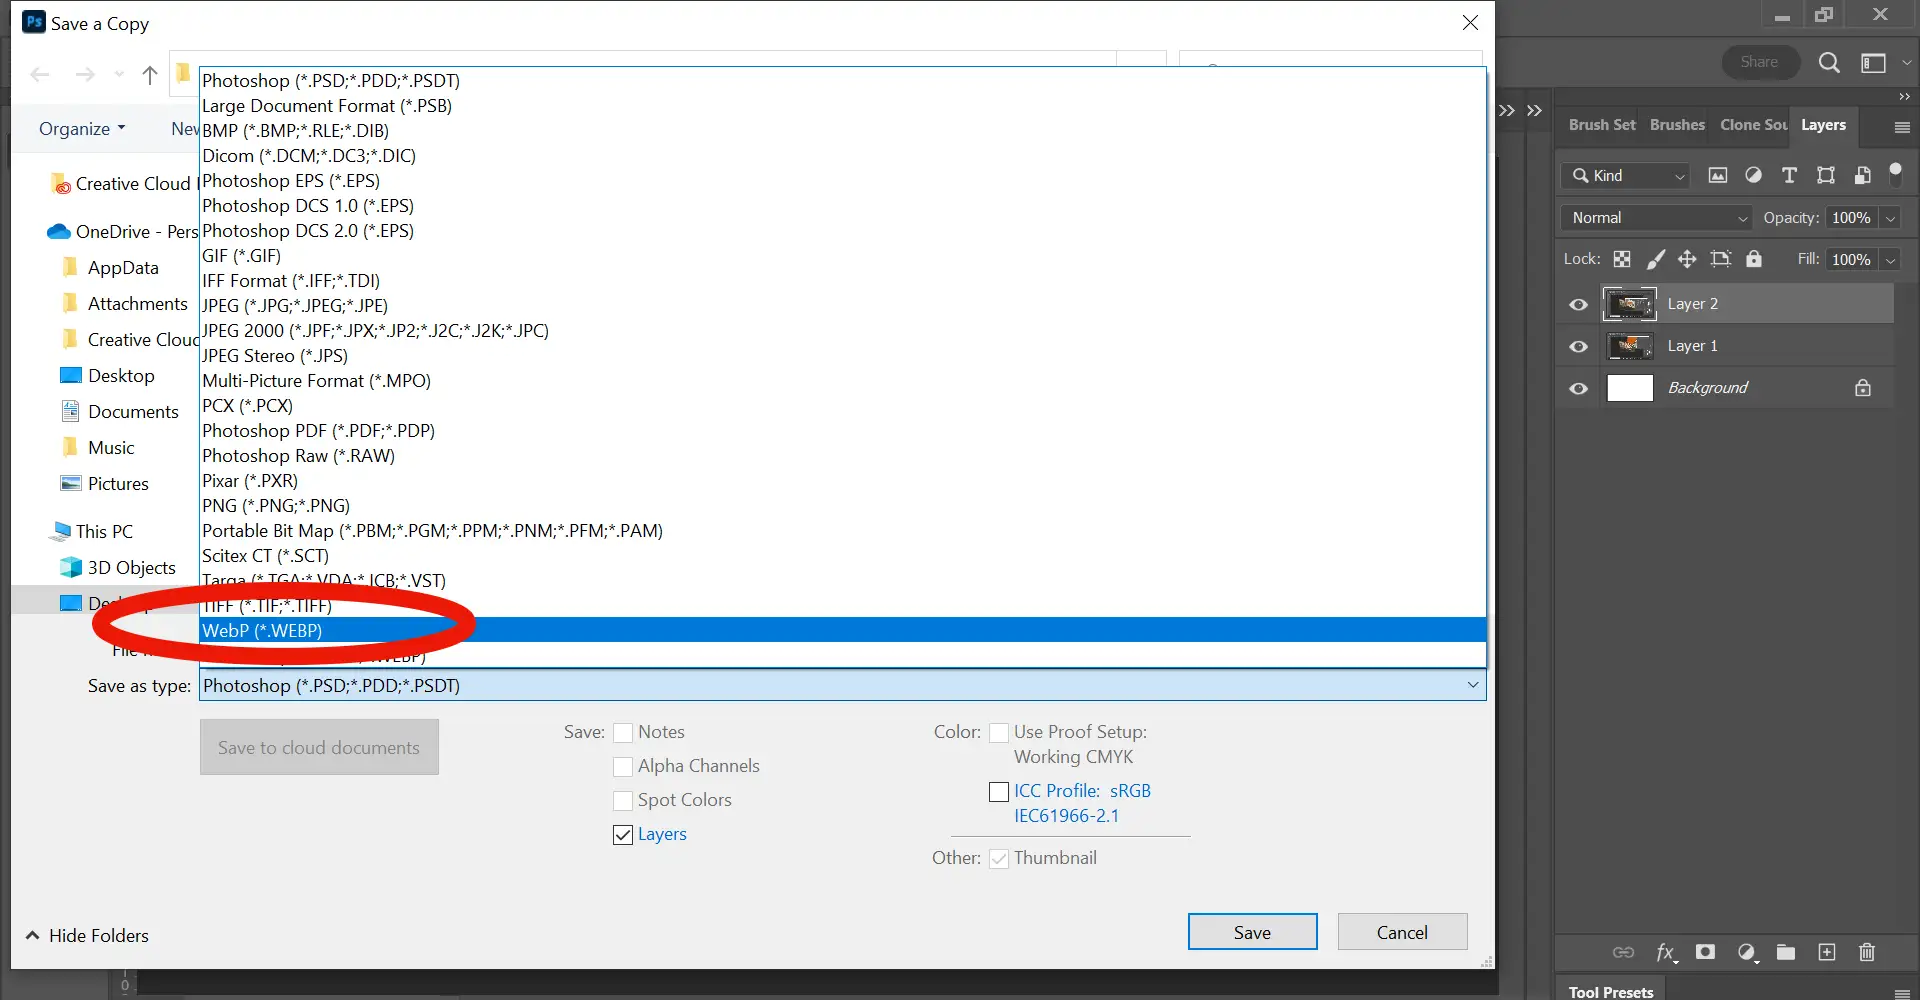
To do this go to File > Save a Copy, (note not File Save).
Then where it says Save as Type, (under the file name box), click the drop down and scroll to WEBP, select.
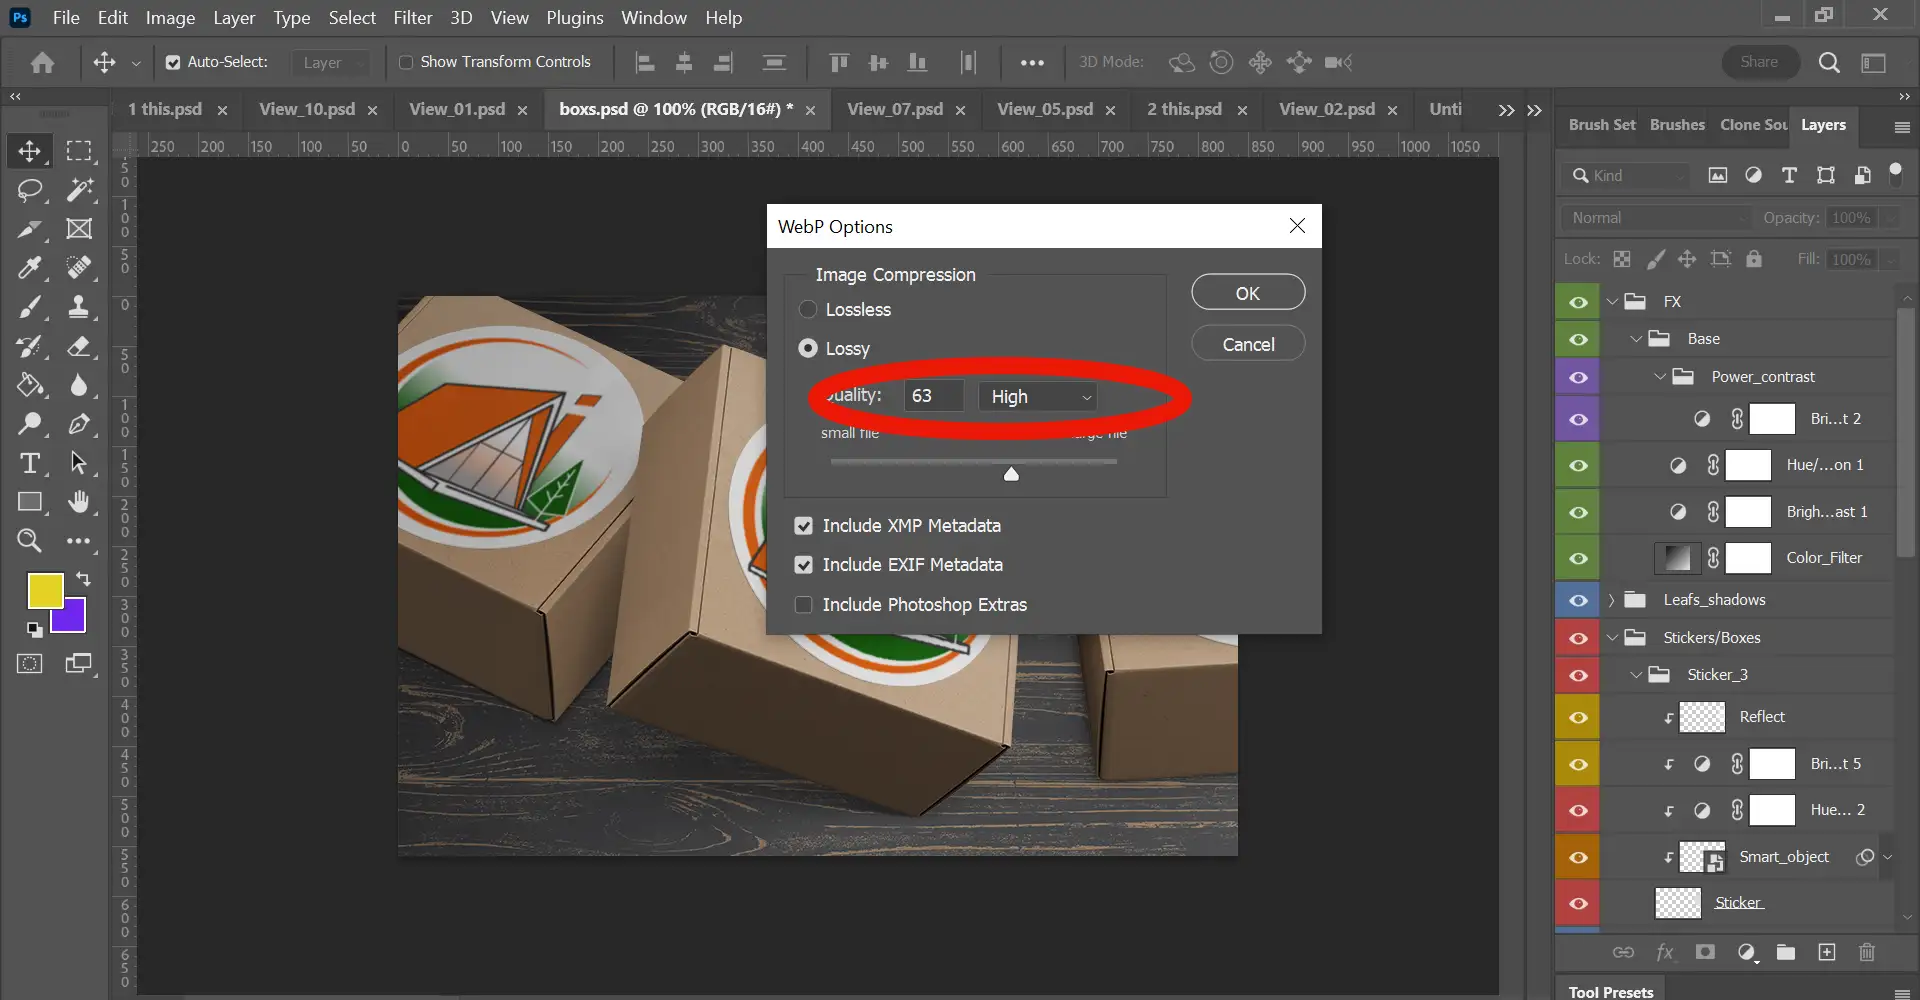
Finally decide what quality to set this WEBP file at.
Given that these files are smaller in KB than jpg files already you don’t have to compromise too much here. I wouldn’t for example set my image quality to medium, I got for a low High quality, so around 63 is perfect.
Now check out your new WEBP image and be blown away by its file size and quality. Best possible image optimization for the web!
More Big Orange Knowledge
Poster Image: How & why to add one to a video in WordPress
One of the easiest ways to improve travel photos is shooting in better light,…

The Top Web Design Trends in 2023
One of the easiest ways to improve travel photos is shooting in better light,…
Create a Lightbox in WordPress
One of the easiest ways to improve travel photos is shooting in better light,…
Importing Compositions from one AE file to another
One of the easiest ways to improve travel photos is shooting in better light,…

The 3 different approaches to building a website.
One of the easiest ways to improve travel photos is shooting in better light,…